 Int64 Software Ltd
Installing the OVERLAPS Trial – Step-by-step
Introduction
This article is a (very) quick look at the process we regularly follow to setup a test instance of OVERLAPS. Its intended purpose is to show the broad steps to demonstrate how easy it is to install a baseline configuration and get your initial instance of OVERLAPS up and running.
Note that some settings may not be needed in your tests, and others are provided with example placeholders that you should adapt to your own environment.
For a more in-depth install guide, we recommend checking out our documentation.
Starting Setup Information
Basic Domain Setup
- For this test we are using a simple single domain forest (named “intdev.local” for this example)
- Only one DC (we would normally test with at least three to replicate a “live” scenario)
- DNS installed on the DC
- “overlaps” CNAME alias pointing to the app server.
- ADCS installed on the DC for LDAPS support
- ADFS installed on the DC for SAML (not included in this guide)
Users and Groups
- Domain Admin account ONLY for setting up the above top level domain settings.
- Elevated admin account for server setup.
- Two groups are created for managing LAPS: “LAPSReaders” (read password and expiry permission, authorized decryptor) and “LAPSWriters” (write expiry permission for manually expiring passwords)
- The computer account of the server is added to these groups as OVERLAPS will be running as “Local System”.
- Permissions to the LAPS attributes is granted to these groups as shown here: https://int64software.com/overlaps/docs/installation-and-configuration/active-directory/#microsoft-windows-laps-permissions
- If you’re using the LAPS password encryption feature (we are in this test), add “LAPSReaders” to the “Authorized Decryptors” Group Policy setting as shown below.
Group Policy
- LAPS GPO (distributed to all managed Windows devices, grouped under a “ManagedDevices” OU in my case)
- Computer Configuration > Policies > Administrative Templates > System > LAPS
- Enable password encryption > Enabled
- Configure authorized password decryptors > Enabled, group: “intdev\LAPSReaders”
- Configure password backup directory > Enabled, Active Directory
- Password Settings > Enabled, set as required
- Computer Configuration > Policies > Windows Settings > Security Settings > Public Key Policies > Trusted Root Certification Authorities
- Add public key for server (generated later)
- Computer Configuration > Policies > Administrative Templates > System > LAPS
- LDAPS GPO (distributed as above)
- Computer Configuration > Policies > Windows Settings > Security Settings > Public Key Policies > Trusted Root Certification Authorities
- If needed, add public key for the ADCS server for LDAPS support.
- Computer Configuration > Policies > Windows Settings > Security Settings > Public Key Policies > Trusted Root Certification Authorities
Application Server Setup for OVERLAPS
- Bare Windows Server 2019 (Desktop Experience) installed on a Hyper-V VM (no other software installed).
- Note that most modern versions of Windows Desktop and Windows Server are supported.
- All Windows Updates installed
- As Server 2019 only starts out with .NET Framework 4.7.2 by default (see here), install version 4.8 as that is required by OVERLAPS.
- (Optional) Install a log viewer (I come from an SMS/SCCM background, so tend to use Trace32, but any will do)
Installing the OVERLAPS Trial
Download and Install the Trial
Download the latest trial version installer from: https://int64software.com/overlaps/docs/#free-trial-version
Run the MSI installer. The only input required is agreeing the the EULA and specifying an install folder, everything else is automatic.
SSL Certificate Generation
I’ll be using a Self-Signed Certificate for SSL, but you might want to get a certificate from ADCS or another certificate authority. You will need the private key certificate for setting up SSL in OVERLAPS, the public key should be distributed to clients for verification.

Enter the primary URL, Organisation Name, and any additional addresses for the SAN (e.g. IP address and/or the name of the server as shown here). This needs to match how users will be accessing the OVERLAPS URL, otherwise certificate verification will fail.
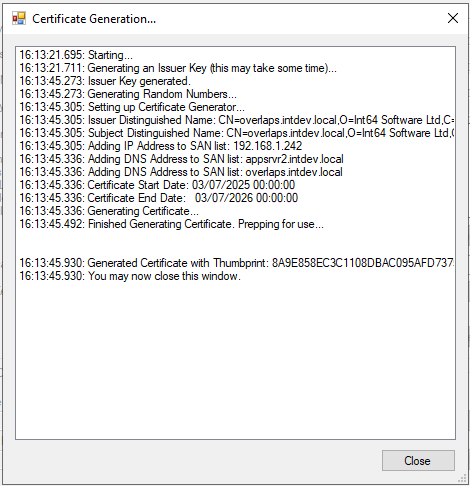
Click Generate Certificate and wait a minute or so for it to finish.
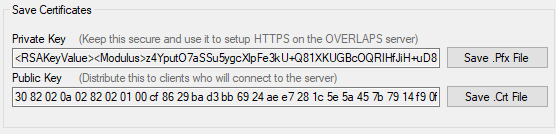
Once it finishes, you’ll be able to save your Private (pfx) and Public (crt) files. Distribute your Public Key only to your clients via Group Policy. Your Private Key should be backed up and kept secret.
Initial OVERLAPS Configuration
In order to setup OVERLAPS for use through its main web UI, there are a few configuration steps you’ll need to carry out in the Configuration Utility first.
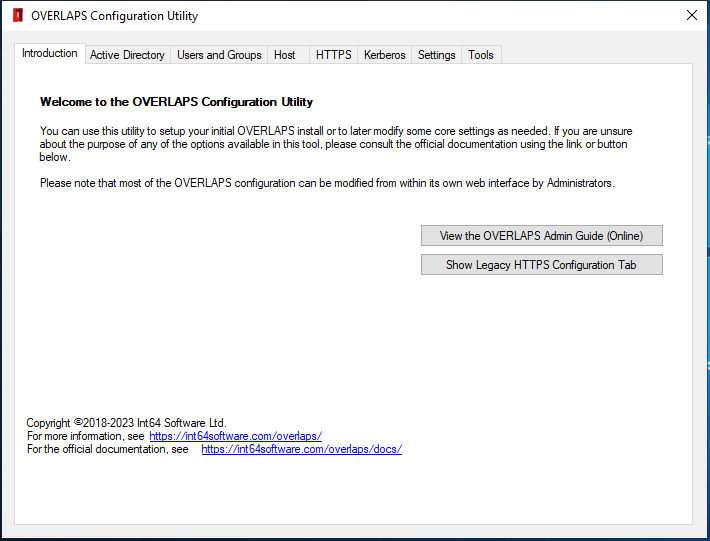
Launch the OVERLAPS Configuration Utility from the Start Menu.
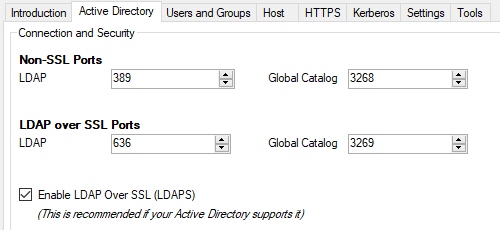
In the Active Directory tab I check the ports are correct and enable LDAPS (only if your domain supports it).
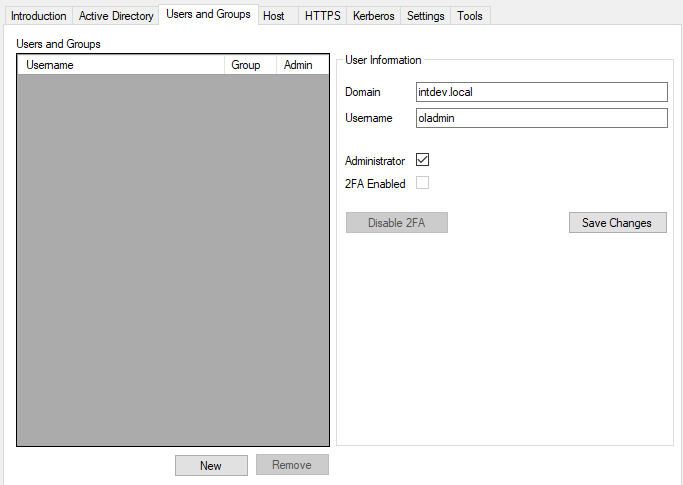
Under Users and Groups, click “New“, enter the username of your first administrator, check the “Administrator” box and click “Save Changes“. Only one admin needs to be added at this time, the rest of your users can be added within OVERLAPS.
In the “Host” tab, just check that the ports are correct at this time. If the service fails to load, check that there isn’t another application with conflicting ports on the server. All other information in this tab will be automatically populated from the HTTPS settings.
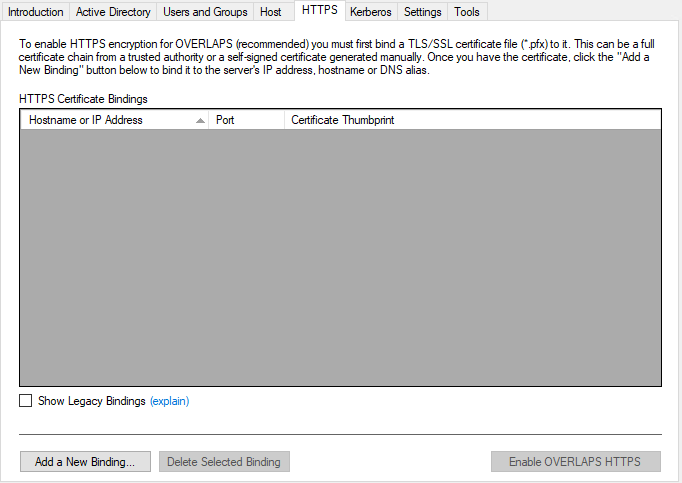
Under the HTTPS tab, click “Add a New Binding“
- Browse to and open your Private Key certificate (Pfx)
- Enter the password if it has one when prompted
- The utility will automatically try to determine if the certificate is Full-Chain or Self-Signed (it needs to know so that it can put it in the correct store accordingly), but double-check the correct one is selected for your certificate.
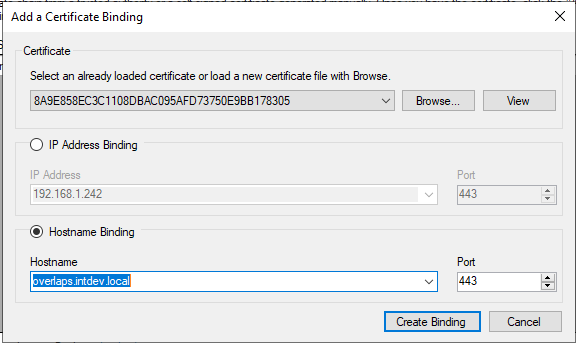
- Select your primary URL for OVERLAPS under the “Hostname Binding” section, confirm the port, and click “Create Binding“.
- If you want to bind SSL to any other URLS (e.g. the ip address or name of the server), then repeat this process for each of them. Note that you don’t need to load the certificate again as it will automatically select it while the application is still open.
- Click “Enable OVERLAPS HTTPS“

You will be prompted to restart the service, select Yes.
Finally, in the Kerberos tab, click the two “Enable Kerberos” buttons. This will configure Kerberos encryption for the Windows Integrated Authentication login process if you plan on using it. Note that most client browsers will need additional steps to use this though.
Exit the Configuration Utility.
Setup Complete
With that all done, you can now login to OVERLAPS at its main URL and check that everything is working. If it is, then you can start adding more users/groups and setting up their permissions from within OVERLAPS.
Like the article? Share with your friends: