14. Authorisation
If you have configured an email server (see Email Server Configuration) then you will have the ability to restrict user’s permissions so that they require manual authorisation to read and/or expire a computer’s password in a given Organisational Unit.
This is configured through the Permissions screen in the Config page (Container Permissions), or by the per-User/Group Self-Service settings (Self Service Settings).
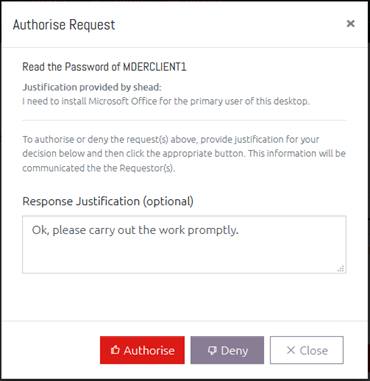
If a user requires authorisation for an action, they will be prompted to provide their justification. This will then create an Authorisation Request which is emailed to any named Authorisers for that particular OU. Any one of these authorisers can then Authorise or Deny the request (optionally providing their reasoning).

14.1 Authorisation Page Sections
The Authorisation page is split into three sections (only one of which are available to non-authorisers):
14.1.1 My Requests
Shows a list of Authorisation Requests for the currently logged in user and their status. Once authorisation has been granted, the user can click the hostname to directly access the password from this screen (without having to browse to or search for the computer again). They can also click the justification link to see the current status of the request and what responses (if any) have been given.
14.1.2 Pending Requests
Lists any pending Authorisation Requests which the currently logged in user has permission to authorise or deny.
Clicking the hostname of a computer will allow you to authorise or deny individual requests, or you can select multiple requests and click the Authorise/Deny Selected Requests button to process them in bulk.
Clicking the Read link under Justification will allow you to see that request’s justification (if any was provided).
Once a request has been authorised or denied, it cannot be changed. To cancel a request which was authorised erroneously you must instead delete it, this can be done from the Historical Requests section.
14.1.3 Historical Requests
Shows a list of old requests which were either authorised or denied. Authorisation Requests are deleted periodically according to your settings (see Settings -> Security). If you need information about an old request which has been deleted, you should consult the History page.
14.2 Requesting Permission to Access a Password
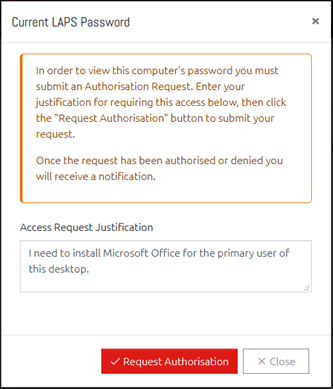
If a user requires authorisation to view the passwords for the computers in the current Organizational Unit, then when they click to view one of those passwords, instead of immediately seeing the password, they will instead be prompted to request access.

Users are given the option to provide additional justification for accessing this password. This is not required but is recommended for auditing purposes.
Once the request has been made, any user or users who have Authoriser permission to this Organizational unit will be emailed to notify them that there is a request that requires their attention. They can then login to OVERLAPS and choose to Authorise or Deny the request.

Once a request has been authorised or denied, the Requester will be notified by email and only then will, if the request was authorised, be able to read the password.
14.3 Authorisation Request Expiry
By default, as soon as a user who has received authorisation views the target computer’s password, that request is then automatically expired. This means that if they attempt to view the password again, they will need to send another request.
In the Security section of the site settings (see Security), you can change this so that an authorised Authorisation Request will stay active for a given number of minutes after it is first accessed. This allows a certain amount of grace time in case the user forgets the password or needs it again very soon afterwards.
14.4 Justification

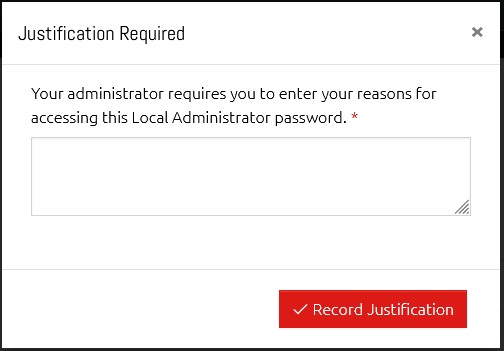
If, instead of authorisation, the user is configured to have to provide Justification before viewing a password, they will be presented with this dialog so that they can log why they are accessing it. This information is written to the History Log.