12. Computer List
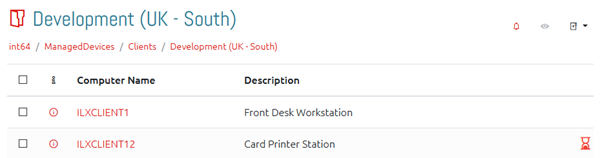
When a valid container is selected, you will see its name, a breadcrumb navigation list, and any computers in the container.
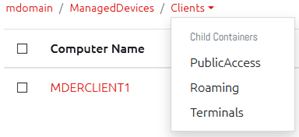
12.1 Breadcrumbs
Use the breadcrumb links to jump to any container immediately above the current one.
Alternatively, click the last item (the current container) to show a dropdown of the child containers under this one, allowing you to quickly navigate further down the tree (as shown below).
Note that if the current user does not have permission to any of these containers, one of two differences will show depending on your settings. For more information on this, see Config -> Settings -> Security -> Organizational Unit Visibility.
If you have unchecked the option to “Hide links to containers when a user does not have permission to it” then these containers simply will not show in the breadcrumbs.
If, however, you have this option checked, then the containers will be shown in the breadcrumbs, but they will not be clickable links.
12.2 Viewing Computer Information
Users with the Read Computer Info permission can open a window with more detailed information about any of the computers in the list by clicking the i icon next to it.
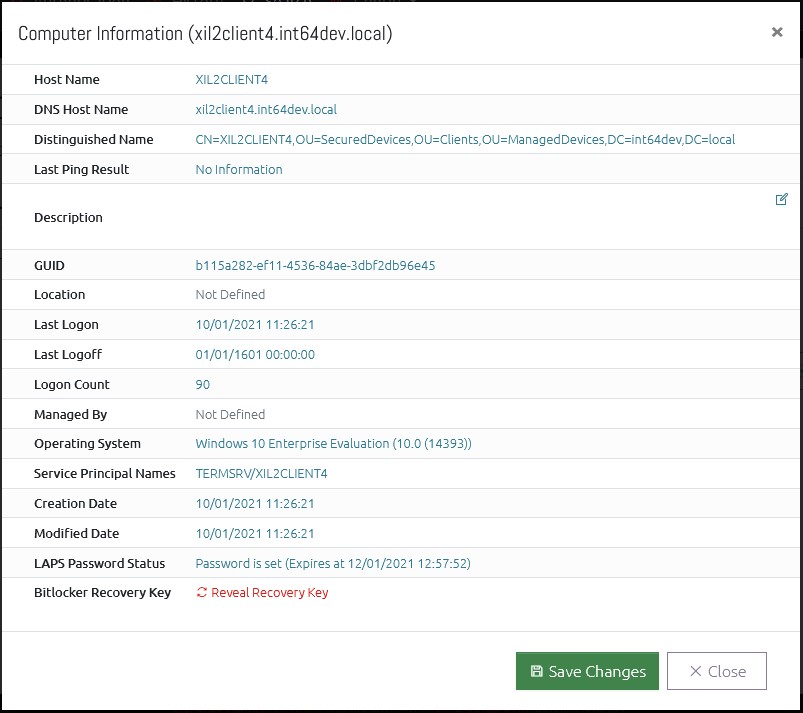
If the user has the Write Computer Information permission, they can also click the Description field to change it. This information is written to the Active Directory description field if OVERLAPS has permission to do so.
12.2.1 Bitlocker Recovery Keys
If the option is enabled (see Configuration -> Settings -> Active Directory), users with Read Computer Information permission can also retrieve the Bitlocker Recovery Key of a computer by clicking the "Reveal Recovery Key" link.
In order to read the Bitlocker Recovery Key from Active Directory, OVERLAPS must be given the delegate rights to do so. For more information, see Bitlocker Recovery Key Permissions.
12.3 Viewing a Single Computer's Password
From the computer list you can click on a computer to display its LAPS managed Local Administrator password.
Trial versions will display the message TRIALVERSION instead of the actual password. However, the background work to retrieve the password is still carried out to help make sure that your configuration is correct and works with OVERLAPS prior to purchase.
12.3.1 Plain Text View

From this window you can click the “Copy to Clipboard” button to have the password copied to your system clipboard.
12.3.2 Phonetic Alphabet View
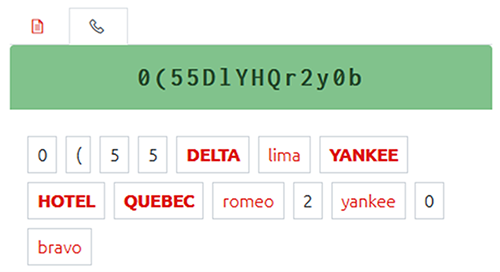
Clicking the telephone icon (shown below) switches the view to the Phonetic Alphabet view. There are several of these available (selected in the Config page, see Customisation), this example shows the short NATO alphabet. It is also possible to create your own phonetic alphabets, see here for details.
12.3.3 Password History
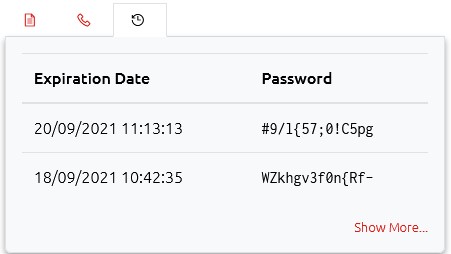
If enabled in Settings -> Logging and History, a recent history of this computer's passwords will be shown in this tab for reference.
Note that this is currently separate from the Windows LAPS history feature.
Each entry shows a date, but note that this shows when the password was due to expire, not when it actually expired. So, if for example two passwords were shown:
| Expiration Date | Password |
|---|---|
| 2021-01-01 10:00:00 | Password#1 |
| 2021-02-01 11:00:00 | Password#2 |
We know that "Password#1" was expired some time around 10:00 on the 1st January, depending on Group Policy. We also know that between this time and 1st February it had been set to "Password#2".
If the date you need isn't shown, click the "Show More" link to be taken to the Password History page where you can specify the date range to show.

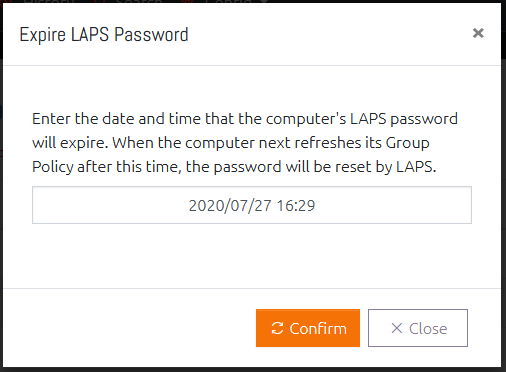
12.3.4 Expiring a Password
This has two modes of operation depending on your settings: immediate and specific date/time. By default, a user with the Expire Password permission using this function will cause the password expiry to be set in the past, thereby triggering a password reset on the computer at the next opportunity.
If the global Allow All Users to Specify an Expiry Date and Time setting has been enabled (see Password Expiration Options), then all users with the Expire Password permission will instead be prompted to enter an expiry date and time.
Alternatively, if you don’t want to set this for all users and would prefer to do it on a per-user/group basis, then you can change the “Set a Precise Expire Date & Time” setting to enabled on a user’s User Access Levels settings (see Changing User’s Access Levels).
Note that an expired LAPS managed password will only actually reset when the computer next performs a Group Policy update. You can use the Computer Management Tools to trigger this on demand if needed.
12.4 Batch Password Retrieval

Selecting one or more computers by clicking the checkbox next to their name and then clicking the “Display Passwords” button will retrieve the current password information for all of the selected computers. When retrieved, passwords are blurred for security reasons and can be displayed by hovering over the password or toggled between blurred and displayed by clicking it.
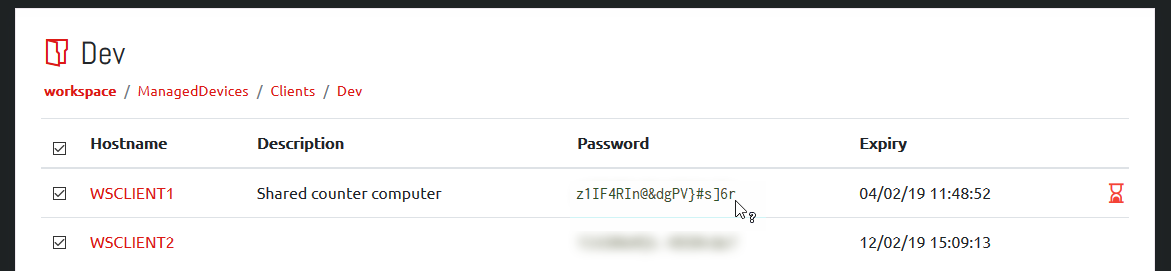
12.5 Computer Status Alerts
Each computer may show an alert icon on the right side of its entry. This indicates that the state of that computer’s LAPS managed password:
12.5.1 Password Expired Warning

This symbol indicates that the LAPS password has expired and is due to be refreshed by the system. If this remains in this state for a long time, it may indicate that the computer is not processing its LAPS policy correctly.
12.5.2 Password Not Set Warning

This alert indicates that the computer does not have any LAPS password data in Active Directory. If your LAPS installation is new, or the computer has only recently been added then this may be normal.
12.6 Getting Notifications
If you have configured an email server (see Email Server Configuration) then the Notifications system becomes available. When this happens, a new button will appear in each container.

Clicking this brings up the Manage Notifications window where you can set or remove what notifications you want to receive and how often.
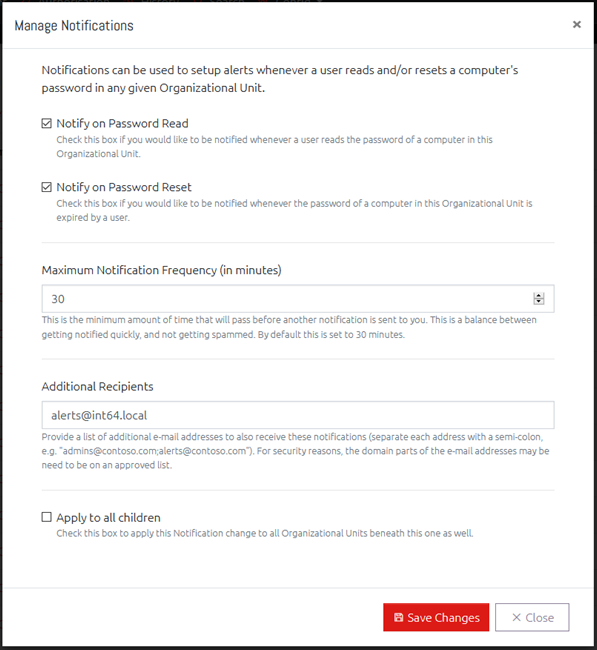
12.6.1 Triggers
You can have notifications sent to you when anyone reads the password of a computer in this Organisational Unit, expires a password, or both.
12.6.2 Maximum Notification Frequency
Setting the Maximum Notification Frequency will prevent you receiving a notification every time one of these actions happens. Instead they will be grouped together and only sent at the specified frequency.
12.6.3 Additional Recipients
If you want other people to receive these notifications as well, or want them sent to a distribution group, then you can add additional email addresses here separated by a semi-colon (;).
If the Restrict Recipient Domains setting has been defined in Email Settings (see Email Server Configuration), then any email addresses here must be a part of the domain(s) listed in that setting. This is designed to prevent data from leaving your domain unintentionally.
12.6.4 Apply to all children
Finally, you can opt to also apply these notification settings to every Organisational Unit under the currently open container by checking the “Apply to all child containers” box. This will only apply to containers that you already have permission to access.
12.7 Computer Management Tools
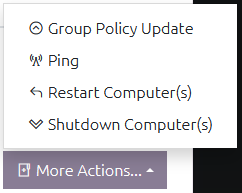
You can get OVERLAPS to perform additional tasks on the selected computers from the “More Actions” button. Currently this is limited to performing an ICMP Ping, a Group Policy Update, and Restarting or Shutting Down the computer or computers.
Note that all tools except for Ping require Windows Management Instrumentation (WMI) access to the client computers (see Computer Management Tool Permissions).
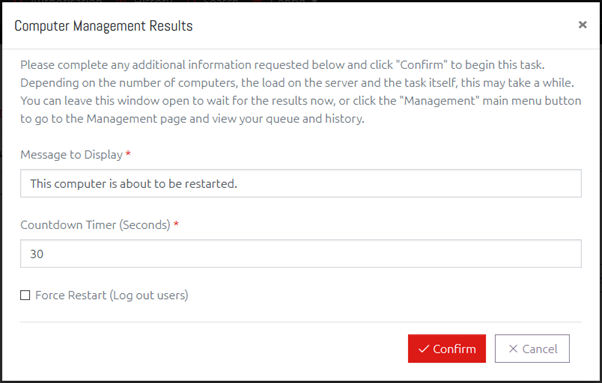
Clicking one of the Computer Management Tools when one or more computers are selected will open a window which may prompt the user for additional parameters and/or confirmation if needed, and will initiate the task and allow the user to monitor its progress. After the task is initiated, its progress and results can also be viewed in the Management page.
All Computer Management work is controlled by a queue and handled by a background thread.
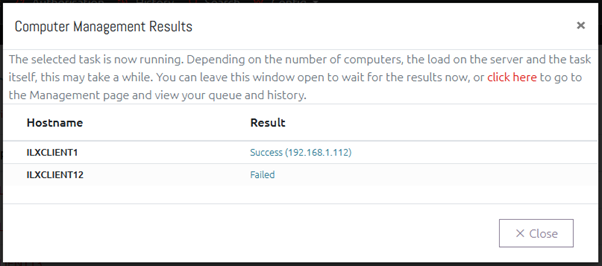
The results can also be seen in the Management page.